Need to pixelate an image but not sure how to get the best result? Whether you're making game assets, social media graphics, or just having fun with photos, the approach you take makes a big difference. Let me share what works well based on different types of projects.
Pixelating images sounds simple – you just make everything blocky, right? But there's actually a lot to consider. The pixel size, colors, style, and settings all affect how your final image looks.
Get it right, and you have something awesome. Get it wrong, and it might look muddy or unrecognizable.
Think about What You Want
Before you start, ask yourself what you're trying to achieve:
- Is this for a game? You might need sprites, characters, or items
- Is this for social media? You probably want something eye-catching and clear
- Is this for a profile picture? It needs to look good at small sizes
- Is this for print? Resolution and scalability matter more
Your goal determines the best approach. A game sprite needs different treatment than a profile photo. Let's go through common project types and what works for each.
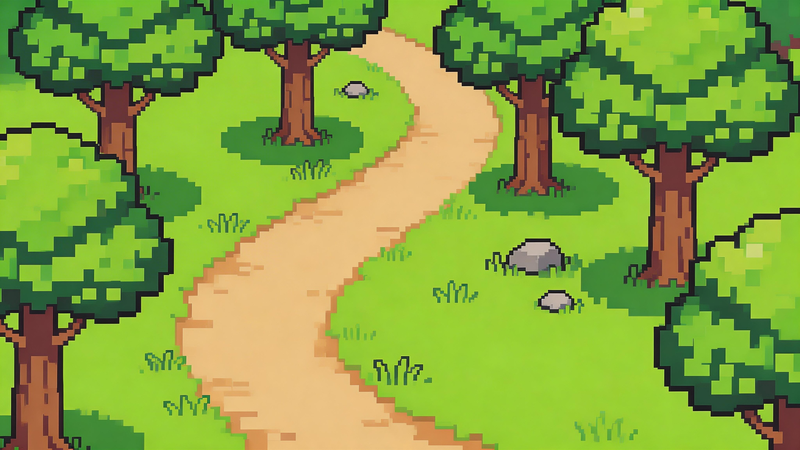
Game Assets and Sprites
When you're making game graphics, pixel art needs to be clear and readable. Players should instantly understand what each object or character is, even at a glance.
Pixel Size for Games
For game sprites, you typically want medium to large pixel sizes. Small details can get lost in gameplay, so bold, simple shapes work better.
- Characters: 8–16 pixels per block usually works well
- Objects and items: 4–8 pixels per block keeps details visible
- Background elements: larger blocks (16+) since they're less important
The key is testing – view your pixel art at the size it will appear in the game. If it's hard to recognize, increase the pixel size or simplify the design.
Colors for Games
Game sprites benefit from limited, distinct colors. The NES 8-bit style is perfect here because it uses strong color separation. Each color serves a purpose – skin tones, clothing, shadows.
You might notice that successful game sprites use color palettes carefully. A character might have just 3–4 shades for clothing, 2–3 for skin, and 1–2 for hair. This keeps sprites readable at small sizes.
Style Choice for Games
For most game projects, NES 8-bit or similar retro styles work best. They give that authentic game feel and colors are designed to be readable. GameBoy style is great if you want a specific retro console look, or you can create a custom palette that matches your game's aesthetic.
Social Media Graphics
Social media is all about standing out and looking good at small sizes. Your pixel art needs to catch attention while remaining clear when someone scrolls past it.
Pixel Size for Social Media
This depends on the platform, but generally:
- Profile pictures: Medium pixelation (8–12) – you want some pixel effect but the face should still be recognizable
- Post images: Can go larger (12–20) for a more dramatic pixel look
- Story content: Similar to posts, but remember it's viewed vertically on phones
The important thing is viewing your pixel art at actual social media size. What looks good on your computer screen might look different on a phone.
Making It Pop
For social media, high contrast or vibrant styles tend to perform well. Bold colors grab attention, and strong contrasts help your image stand out in a busy feed.
The High Contrast preset is worth trying for social graphics. It pushes colors and contrast to make images more eye-catching. You can also increase saturation slightly to make colors more vivid.
What Works on Each Platform
Different platforms have different vibes:
- Twitter/X: Almost anything goes – NES, GameBoy, custom styles all work
- Instagram: Bright, colorful styles tend to perform better
- Discord: Community vibes – GameBoy and NES styles fit well
- Twitch: Consider using your pixel art for emotes, avatars, or overlays
Profile Pictures and Avatars
Profile pictures serve a unique purpose – they represent you or your brand across platforms. They need to be recognizable and memorable.
Getting the Face Right
For profile pictures, keep faces clear. The pixel size shouldn't be so large that facial features disappear. You want people to recognize it's you, even at small sizes.
In my experience, a pixel size of 6–10 works well for portraits. Large enough to look pixelated, small enough to see eyes, nose, and mouth.
Style for Avatars
The best style depends on your personality or brand:
- GameBoy: Shows you love retro games, very distinctive
- NES 8-bit: Classic gamer aesthetic
- Vintage: Gives a more thoughtful, artistic feel
- Default with custom colors: Match your brand colors for consistency
Convert Picture into Pixel Art Online (Step-by-step Guide)
If you want a simple way to apply everything above, using a free image to pixel tool can save you a lot of time. Instead of manually adjusting every detail in complex software, tools like PictoPixel.art let you upload an image, customize pixel sizes and styles, and see the results instantly.
Step 1: Open PictoPixel.art
Start by heading to the PictoPixel.art website in your browser. No signup or installation needed—just open the site and you’re ready to go.
Step 2: Upload the Right Photo
Choosing a good image makes a big difference in your final result. Some photos naturally work better for pixel art:
- Simple subjects – faces, pets, icons, or logos
- Strong contrast – clear light and dark areas
- Clean composition – avoid overly busy or messy backgrounds
- Good quality – higher resolution images give better results
Portraits and simple objects are usually the easiest to convert. More complex images can still work, but you may need to tweak the settings a bit more.
Step 3: Set the Pixel Level
Now it’s time to create the pixel effect. The key setting here is pixel size, which controls how detailed or blocky your image looks.
- Smaller pixels → more detail, less “retro” feel
- Larger pixels → chunkier look, stronger pixel art style
With PictoPixel.art’s live preview, you can instantly see the changes. A good approach is to start in the middle, then adjust based on your image. Faces usually need a bit more detail, while logos can handle bigger blocks.
Step 4: Adjust the Details
After setting the pixel size, you can refine the look with a few simple tweaks:
- Brightness – lighten or darken the image if needed
- Contrast – increase it to make shapes stand out more
- Saturation – control how vivid or muted the colors appear
- Color count – fewer colors can create a more classic retro vibe
You don’t need to overdo it—small changes are often enough to get a great result.
Step 5: Save Your Pixel Art
Once you’re satisfied, download your image as a PNG file. It’s ready to use right away—perfect for social media, profile pictures, websites, or even printing.
Pixel art scales well, so it will still look great at different sizes.
FAQ
What pixel size should I use for my project?
It depends on your purpose. Small pixel sizes (4–8) keep more detail. Medium sizes (8–14) give a balanced pixel effect. Large sizes (16+) make a bold, chunky statement. Test different sizes and view at actual use size.
Can I pixelate images for commercial use?
Usually yes, especially if you're starting with your own images or have proper rights to them. Always check the terms of the pixel art tool you use, and ensure you have rights to any source images.
Why does my pixel art look blurry instead of blocky?
This usually means the pixel size is too small. Increase the pixel size setting to get larger, more defined blocks. The pixel effect becomes more obvious with larger sizes.
Should I use presets or custom settings?
Start with presets to find a style you like, then customize from there. Presets give you a quick starting point, and custom settings let you fine-tune for your specific needs.
Making Pixel Art Work for You
The best way to pixelate images is the way that serves your project. There's no single right answer – it depends on what you're making and what you want to communicate.
Experiment with different settings, try various styles, and don't be afraid to make mistakes. Some of the best pixel art comes from unexpected combinations of settings and images that surprise you.
Ready to create your own pixel art?