Pixel art isn't just one look. It comes in many different styles, each with its own personality. If you've tried converting images to pixel art, you've probably seen preset options like GameBoy, NES 8-bit, or Vintage. But what do these styles actually mean, and when should you use each one? Let me break it down in simple terms.
Each pixel art style mimics a different era or technology. Some look like old video games, others resemble vintage photographs. Knowing which style fits your project can make a big difference in the final result. Whether you're making a profile picture, game graphics, or just having fun, the right style sets the mood perfectly.
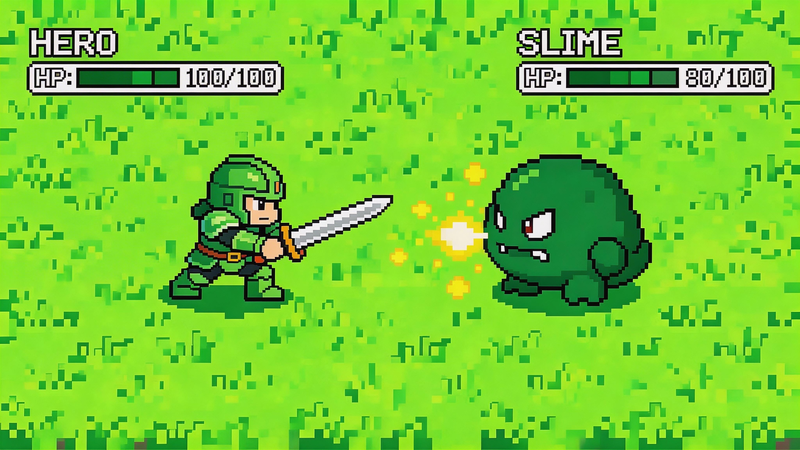
GameBoy Style – The Green Retro Look
The GameBoy style is probably the most recognizable pixel art look. It mimics the original Nintendo GameBoy handheld console from 1989, which had a small greenish screen that could only display four shades of green.
This style gives your image a distinctive green tint and limited color palette. Everything looks like it's on an old portable game screen. It's pure nostalgia for anyone who grew up playing Tetris or Super Mario Land on a GameBoy.
When to Use GameBoy Style
This style works best when you want maximum retro gaming vibes. It's perfect for:
- Profile pictures with a gaming theme
- Content related to retro games
- Images where you want that specific green monochrome look
- Designs that reference 80s and 90s handheld gaming
You might notice that portraits and simple objects look great in GameBoy style. The limited colors actually help by removing distractions and focusing on shapes and contrast.
What Makes It Work
The key to GameBoy style is the four-shade green palette. Your image gets converted to light green, medium green, dark green, and almost black. This creates a tonal look that's surprisingly expressive despite the color limitation.
If you're using a picture to pixel art converter, look for a GameBoy preset. It handles the color conversion automatically so you get that authentic look without any manual work.
NES 8-Bit Style – Classic Video Game Feel
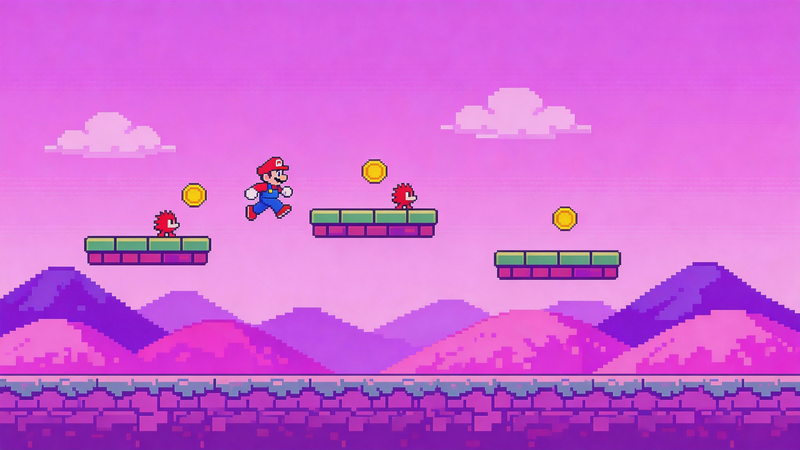
The NES (Nintendo Entertainment System) style brings back the era of 8-bit home consoles. Unlike the monochrome GameBoy, the NES could display 56 colors simultaneously, which was a lot for its time. This style is what most people picture when they think of "pixel art."
NES 8-bit pixel art has vibrant but limited colors, with each color being very distinct. There's no subtle shading – colors are either one shade or another. This creates that blocky, colorful look from classic games like Super Mario Bros. and The Legend of Zelda.
When to Use NES 8-Bit Style
This is your go-to style when you want that classic video game appearance:
- Character sprites and avatars
- Game-related graphics or content
- Fun, colorful designs with energy
- Anything that needs to look like it belongs in an 80s arcade game
I've found that NES style works especially well for characters – people, pets, mascots. The limited colors and bold shading make subjects pop and look like they could be game characters.
What Makes It Work
The NES style uses a restricted color palette with strong contrast between colors. Shadows and highlights are simplified to just a few shades. This creates the crisp, clean look that defines 8-bit art.
When choosing this style, look for presets labeled "NES," "8-bit," or "Retro Game." The preset will handle the color reduction and give you that authentic console look.
Vintage Style – Old Photo Aesthetic

Not all pixel art has to look like a video game. The vintage style mimics old, faded photographs – like something you'd find in a shoebox from decades ago. It's softer and more muted than the bold game styles.
Vintage pixel art has desaturated colors, slightly faded tones, and a gentle, aged appearance. It feels nostalgic in a different way – more like a memory than a game.
When to Use Vintage Style
This style shines when you want a timeless, sentimental mood:
- Family photos and portraits
- Memorial or commemorative images
- Content with a nostalgic, personal feel
- Designs that need warmth and emotion
In my experience, vintage style is perfect for turning modern photos into something that feels like a cherished memory. It's subtle but powerful.
What Makes It Work
The vintage style achieves its look through reduced saturation and softer color tones. Bright colors become muted, harsh contrasts get smoothed out. The result feels aged and weathered, but in a beautiful way.
Look for presets called "Vintage," "Old Photo," or "Retro Photo" to get this effect automatically. You can also manually lower saturation and use softer colors to create a similar look.
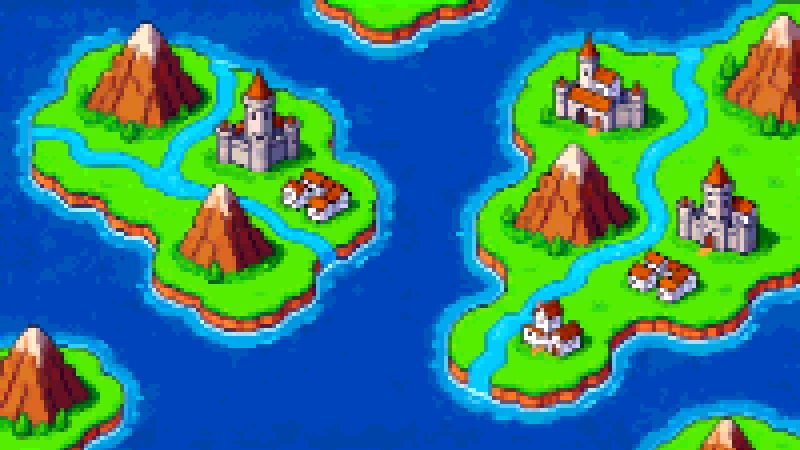
GameBoy Color Style – Retro With More Colors
While the original GameBoy was limited to green shades, the GameBoy Color (released in 1998) could display over 32,000 colors. The GameBoy Color style keeps the pixelated look but adds much more color variety.
This style gives you the blocky pixel effect with a richer, more colorful appearance. It's still recognizably retro, but more vibrant and expressive than the monochrome GameBoy look.
When to Use GameBoy Color Style
Use this when you want retro charm with color:
- Images where you want to recognize colors from the original
- Content that needs color but still looks pixelated
- Fun, playful designs with a gaming twist
- When you like pixel art but don't want limited colors
I like using GameBoy color style for food photos, landscapes, or any image where color is important to the subject. It keeps the pixel art feel without losing the visual information that color provides.
High Contrast Style – Bold and Graphic
The high contrast style isn't tied to a specific era or device. It's all about making a strong visual impact with bold colors and sharp edges.
High contrast pixel art pushes colors to extremes – dark areas become very dark, light areas become very bright. Colors are often more saturated. The result is dramatic, eye-catching, and impossible to ignore.
When to Use High Contrast Style
This style is perfect when you need to stand out:
- Logos and branding elements
- Graphics that need to be bold and readable
- Social media images that grab attention
- Designs where clarity and impact matter more than subtlety
If you're making graphics for a thumbnail, banner, or profile picture, high contrast can help you get noticed. It's especially effective for small images viewed at a distance.
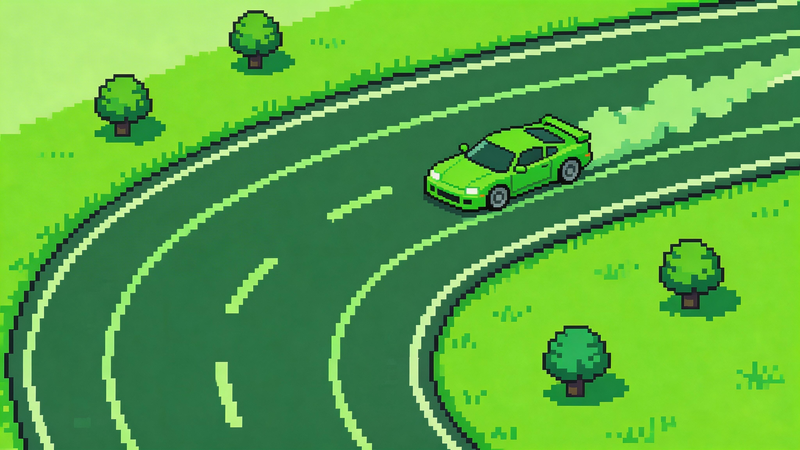
Default Style – Balanced and Versatile

Many pixel art converters offer a "default" or standard preset. This isn't based on any specific device or era – it's just a balanced pixel art effect that works well for most images.
The default style usually gives you moderate pixelation with good color retention. It's pixelated enough to look like pixel art, but not so blocky that you lose detail.
When to Use Default Style
This is your safe choice when you're not sure:
- First-time users experimenting with pixel art
- Images where you want a general pixel art look
- When you don't need a specific era or theme
- Starting point before adjusting custom settings
Think of the default style as a middle ground. It works for almost anything, even if it's not the most dramatic or stylistically specific option.
How to Choose the Right Style
With so many options, how do you pick the best one? Here's a simple approach:
Start with your purpose
What is the pixel art for? A gaming profile? A nostalgic post? A bold logo? Let the purpose guide your choice.
Match the mood
Each style has a personality. GameBoy is playful and nostalgic. NES is energetic and fun. Vintage is sentimental and warm. High contrast is bold and confident. Pick the mood that fits your message.
Consider your subject
Some styles work better for certain images. Portraits look great in GameBoy or vintage. Characters shine in NES style. Landscapes might work better with GameBoy color or default.
Try multiple styles
The easiest way to decide is to test a few. Upload your image, try each preset, and see what speaks to you. You might be surprised by what looks best.
Using Tools to Apply Styles
You don't need to manually adjust complex settings to get these styles. Most online pixel art converters include presets that handle everything for you.
pictopixel.art offers all the styles mentioned above in a simple interface. You can convert any image to pixel art and instantly switch between GameBoy, NES 8-bit, Vintage, High Contrast, and more. Each preset applies the right colors and settings automatically, so you get the authentic look without any technical work.
The tool also lets you customize each style by adjusting pixel size, brightness, contrast, saturation, and color palette. This means you can start with a preset and fine-tune it to get exactly the look you want.
FAQ
Can I mix different styles in one image?
Most pixel art converters apply one style to the entire image. If you want mixed styles, you'd need to create separate pixel art versions and combine them in image editing software. For most uses, sticking to one consistent style looks best.
Which style works best for photos of people?
Portraits tend to look great in GameBoy (for a unique green look), Vintage (for a nostalgic feel), or Default (for a balanced result). NES style can work well too, especially if you want the person to look like a game character.
Do these styles work for colorblind users?
Some styles like GameBoy are monochromatic, which might be challenging depending on the type of colorblindness. NES and High Contrast styles use bold color differences that can be easier to distinguish. Always consider accessibility if your audience includes colorblind users.
Finding Your Favorite Pixel Art Style
The best way to understand these pixel art styles is to try them yourself. Each one has its own character and charm. What looks amazing on one image might not work as well on another, so experiment and see what happens.
In my experience, the styles I end up loving are often the ones I didn't expect. A serious portrait might become playful in GameBoy style. A bright photo might gain emotional depth in vintage mode. That's the fun of pixel art – it transforms images in surprising ways.
Just pick a few photos and start exploring with an image to pixel art tool. You'll quickly discover which styles resonate with you and which ones fit your projects best. Before long, you'll know exactly which preset to choose for any image.
Enjoy pixelating!
Ready to create your own pixel art?